I used this way to install valetudo-re on my Roborock S6, tested with 2 devices. I’m not responsible if you kill your device.
First we must gain ssh root access to the vacuum, that only works with some soldering. Then we install the new software on 2 partitions, seems to be some kind of backup concept.
preparations
- USB RS232 adapter 3.3V
- micro usb cable for GND connection
- a roborock S6 (you don’t need a reset from the device)
At first step, you should visit https://builder.dontvacuum.me/_s6.html to start building a version from valetudo-re for you.
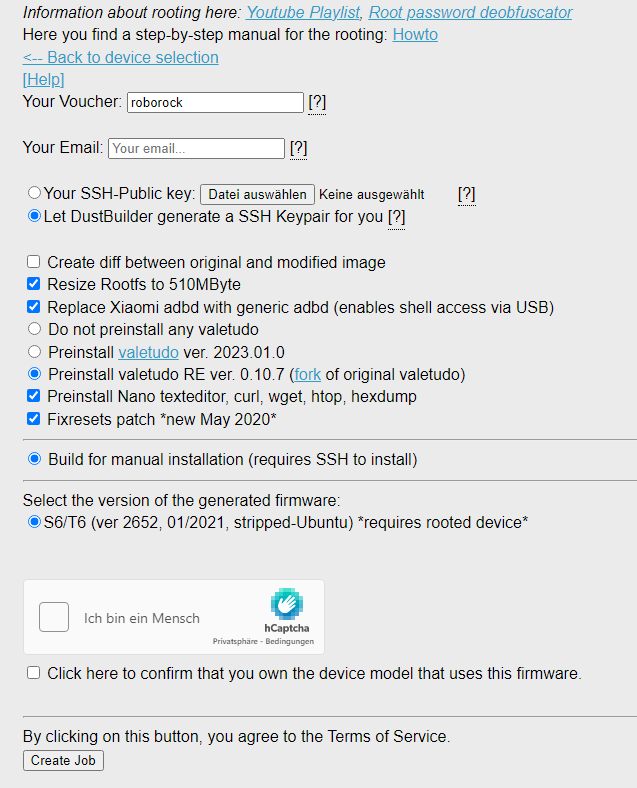
After a few minutes, you should receive a mail with the software
now you could start to deassemble the device, you must reach 2 testpoints under the mainboard. Have fun. 😀
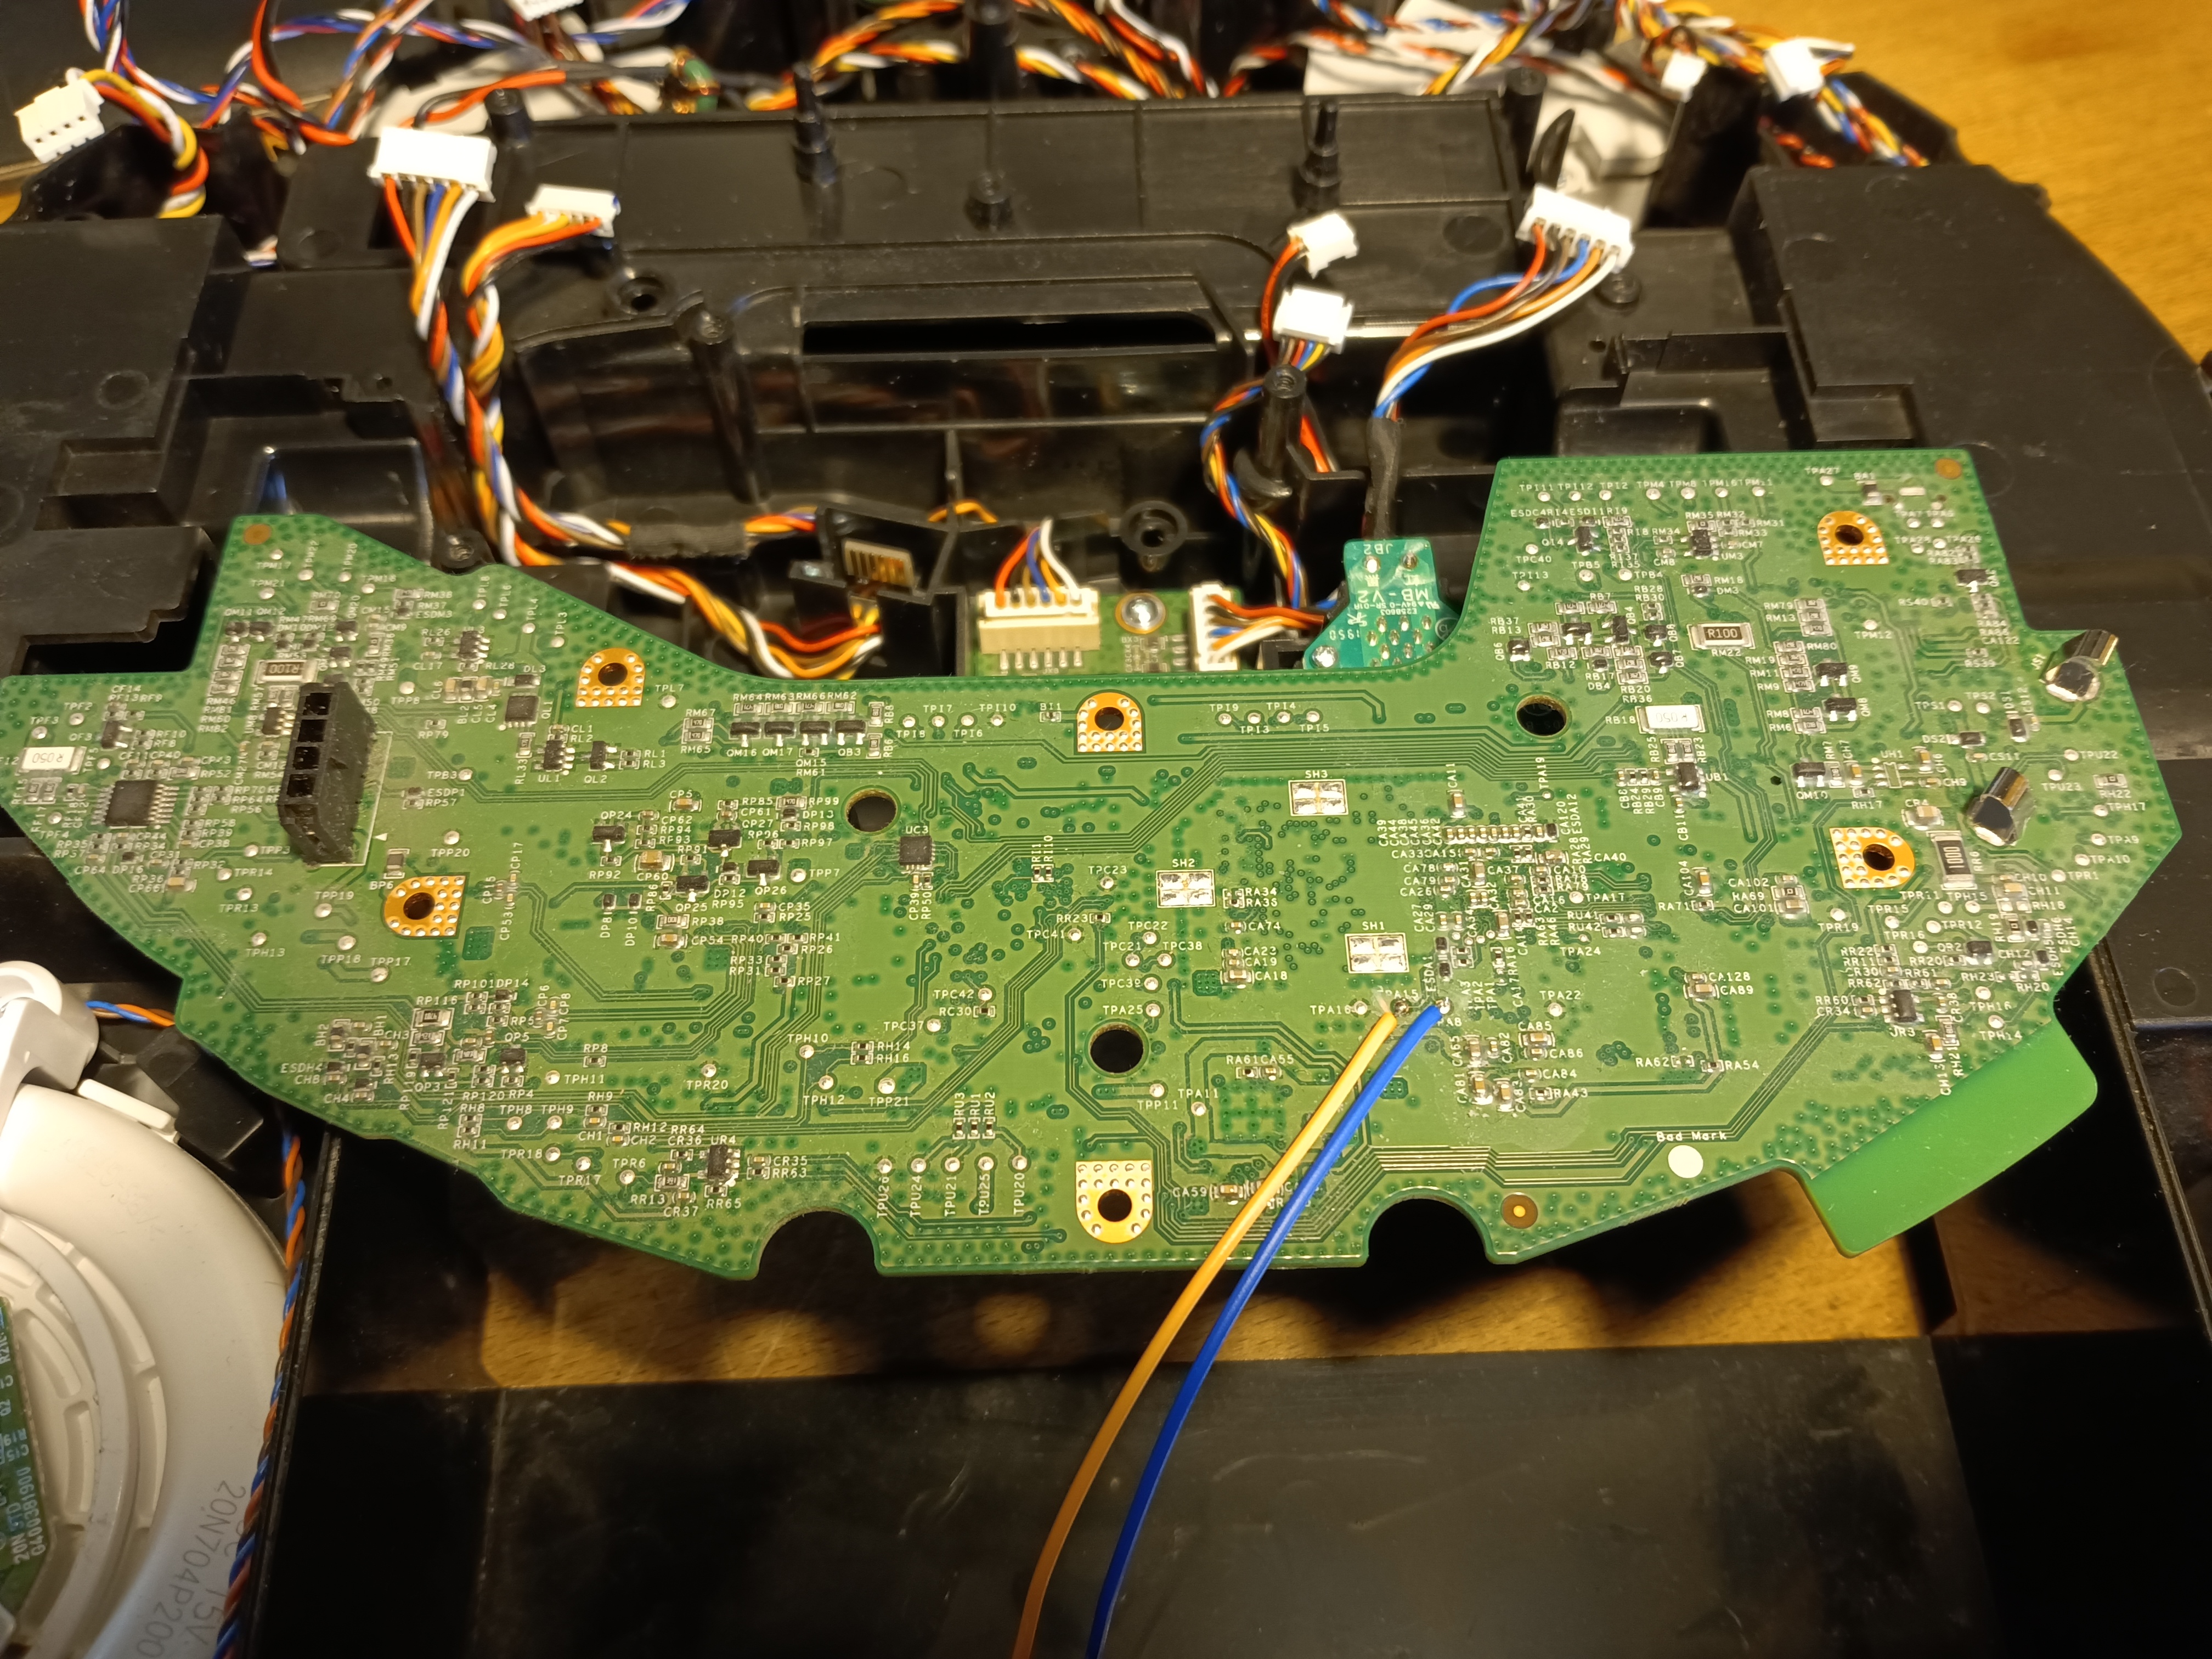
TPA8 and TPA15 are RXD and TXD, I soldered 2 cables. You must remove some kind of protective paint.
on boot, press „s“ until „sunxi“ appears.
setenv boot_fs a
setenv setargs_mmc ${setargs_mmc} init=/bin/sh
boot
In the next 5 seconds:
echo 'V' > /dev/watchdog
disable iptables stuff
sed -i -e '/    iptables -I INPUT -j DROP -p tcp --dport 22/s/^/#/g' /opt/rockrobo/watchdog/rrwatchdoge.conf
sed -i -E 's/dport 22/dport 29/g' /opt/rockrobo/watchdog/WatchDoge
sed -i -E 's/dport 22/dport 29/g' /opt/rockrobo/rrlog/rrlogd
install public ssh key
chown root:root /root
chmod 700 /root
mkdir /root/.ssh
chmod 700 /root/.ssh
vi /root/.ssh/authorized_keys
now you have access with ssh
ssh -oKexAlgorithms=+diffie-hellman-group1-sha1 root@IP
maybe you should adjust the clock with
ntpdate yourntpserver
and don’t forget to set a root password!
Now you cold check the mail from the builder, we only need the tar.gz file.
move file to the device
scp -oKexAlgorithms=+diffie-hellman-group1-sha1 /tmp/roborock.vacuum.x6_2652_fw.tar.gz root@IP:/mnt/data/
install on the device
cd /mnt/data
tar xpvfz roborock.vacuum.x6_2652_fw.tar.gz
./install_b.sh
reboot
after reboot, your ssh public key is away, login with password and install on the second partition
cd /mnt/data
./install_a.sh
Now you can access your vacuum with http://IP on your browser.
Have fun!